
Making a Plywood Coffee Table with a Geometric Steel Base
We were in need of a coffee table for our basement and I wanted to make something that was different than the rest of our furniture and stand as an accent piece. I came across this design online and wanted to put my own spin on it.
Materials
4’ x 8’ x 3/4” plywood (x1)
3/8” x 25’ steel round rod (x1)
1 1/2” x 14” steel flat bar (x2)
Denatured Alcohol
Cutting Oil
Wood Screws
Stain / Paint / Poly (optional)
Epoxy (optional)
Tools
Miter Saw
Circular Saw
Jointer
Router
Orbital Sander
Japanese Pull Saw
Cordless Drill/Driver
Angle Grinder
Edge Guide
Breakdown the material
I start off by cutting the plywood into strips using my circular saw and the rip cut edge guide by Kreg. I like to use this method as much as possible when breaking down sheet goods as I feel it’s easier to manage.

After cutting all the strips I found that they had bowed on me by almost an eighth inch in the middle. I’ll be correcting this later on.

Glue up the plywood blanks
I lined up all of the strips making sure the bow was in the same direction then applied glue using a foam roller to make 4 blanks.

I then clamped everything together using pipe clamps as well as a few scrap 2x4s as caul boards on both ends of the blanks. I also came back and added some sacrificial boards to my pipe clamps to prevent damage on the surface of the blanks when applying clamping pressure.

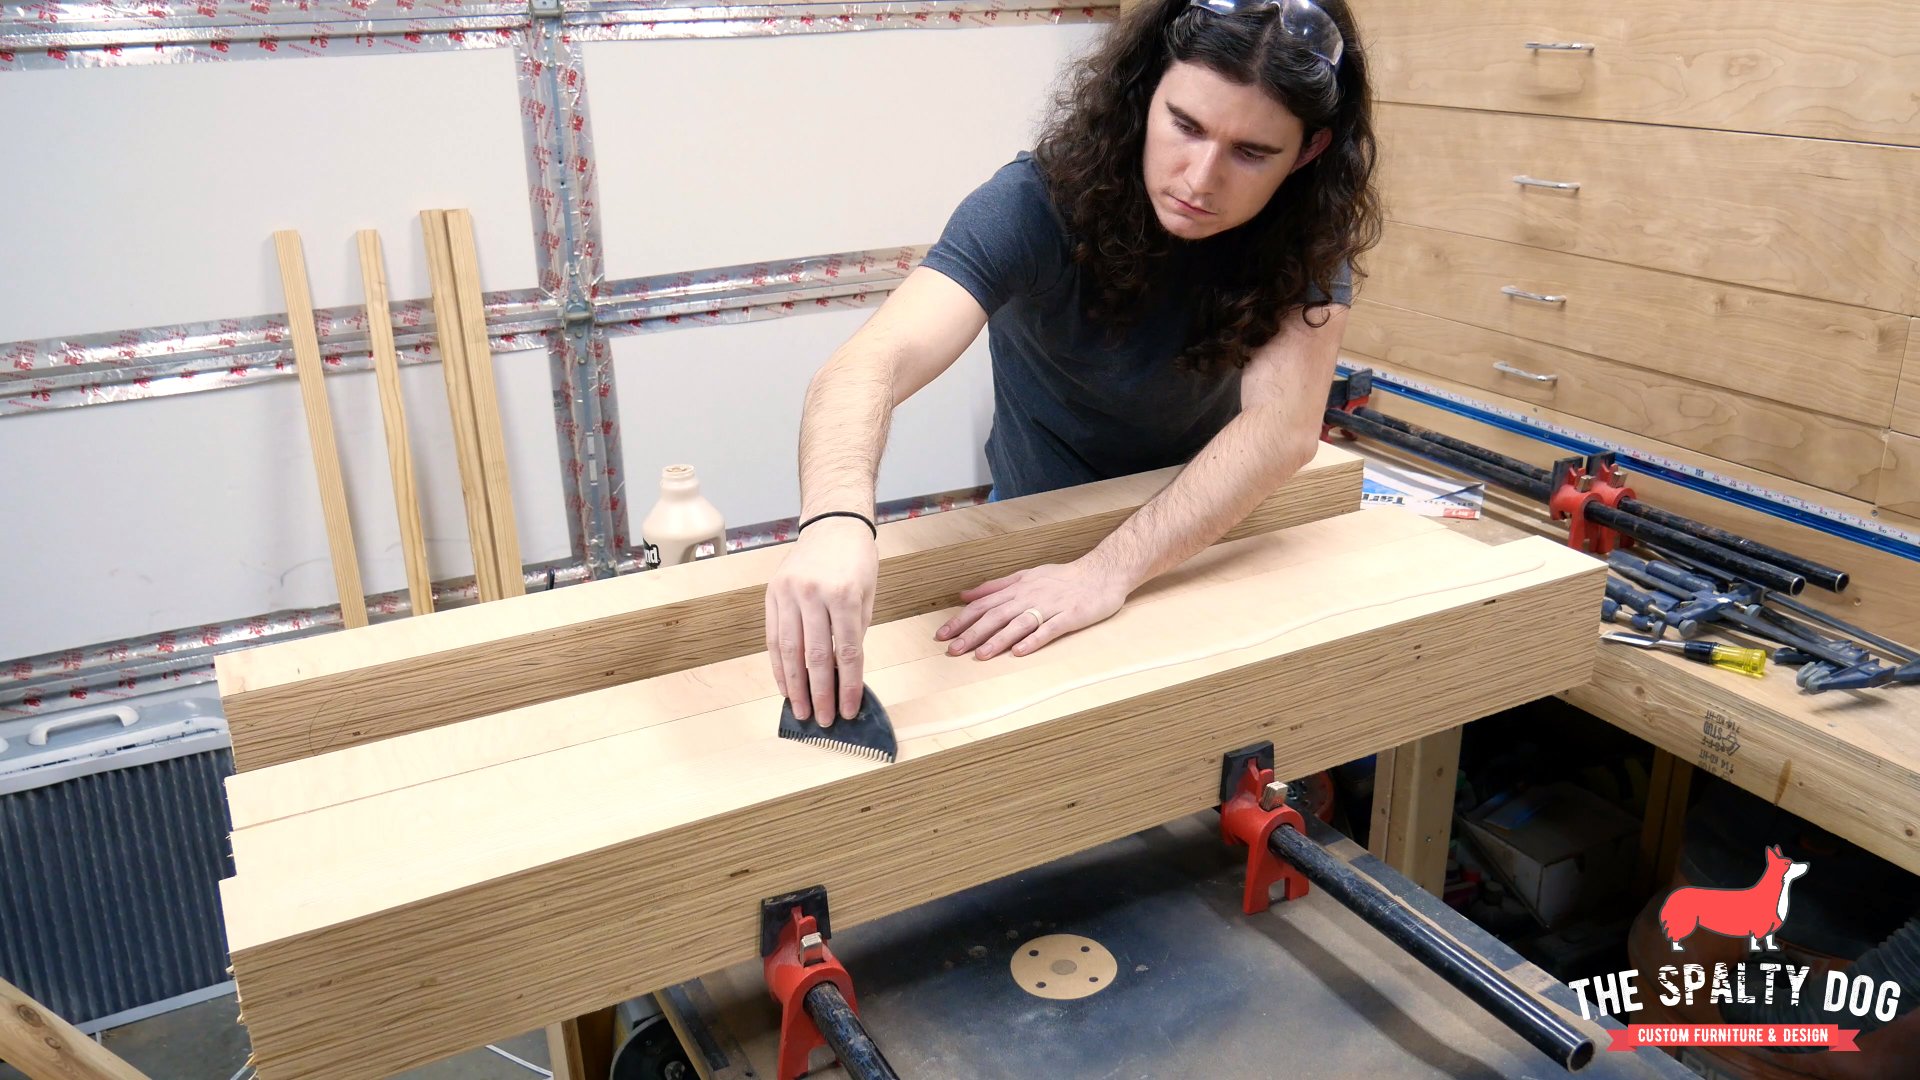
Mill the plywood blanks
I let the glue dry overnight then came back and started work on each of the blanks.

I number each one on end so I can know the order I want for the glue up.

Now it’s time I correct the bow I showed earlier. Since I aligned the bow on each strip before the glue up, each blank can be ran over the jointer like any other board. I make multiple passes to flatten one face while removing the least amount of material. I don’t want to joint the edges of these blanks because I would go through the veneer and they should already be pretty close to 90.

With one flat face on each blank I then move over to the planer to get each one down to final thickness while also making the faces parallel.

Glue up the top
With each blank flattened and the same thickness I follow the same glue up process as I did earlier making sure to use caul boards on both ends along with sacrificial boards on the pipe clamps to prevent surface damage.
I came back the next day to remove the clamps and check out the top.

I found a couple spots where the blanks didn’t fully laminate together. To solve this, I applied some extra thin CA glue for a quicker hold along with regular wood glue to be more permanent. I made sure to spread the glue on as much surface area using the spreader on my silicone brush. Then applying clamping pressure as necessary.

Make the base (Part 1)
With the top glued up I take a break on that and start on the base. Off camera I cut some scrap flat bar using my angle grinder and a cut off wheel. I then measure and mark the center of each piece to help position where I want to attach the legs.

I line up both pieces and strike a couple lines across to determine where I want the mounting holes. After marking each location with a punch I start by using a smaller bit to make my through hole. I then go back with a larger bit to create a countersink. When drilling into metal it’s important to make sure you regularly apply cutting oil to avoid damaging the bit.

Next, I measure and cut the legs using my angle grinder and a cut off wheel.

With the pieces cut, I then tack everything together to create each leg. I used a couple magnets and a speed square to line up and hold everything in place which made the job a lot easier.

To make sure the legs match I lined them up using a square and held them together with one of the magnets to position the pieces for the second one.

For the final piece in each leg I used both magnets to hold it at 90 degrees to the others while I tacked it in place. Then I checked to make sure each leg matched which in this case they were pretty close.

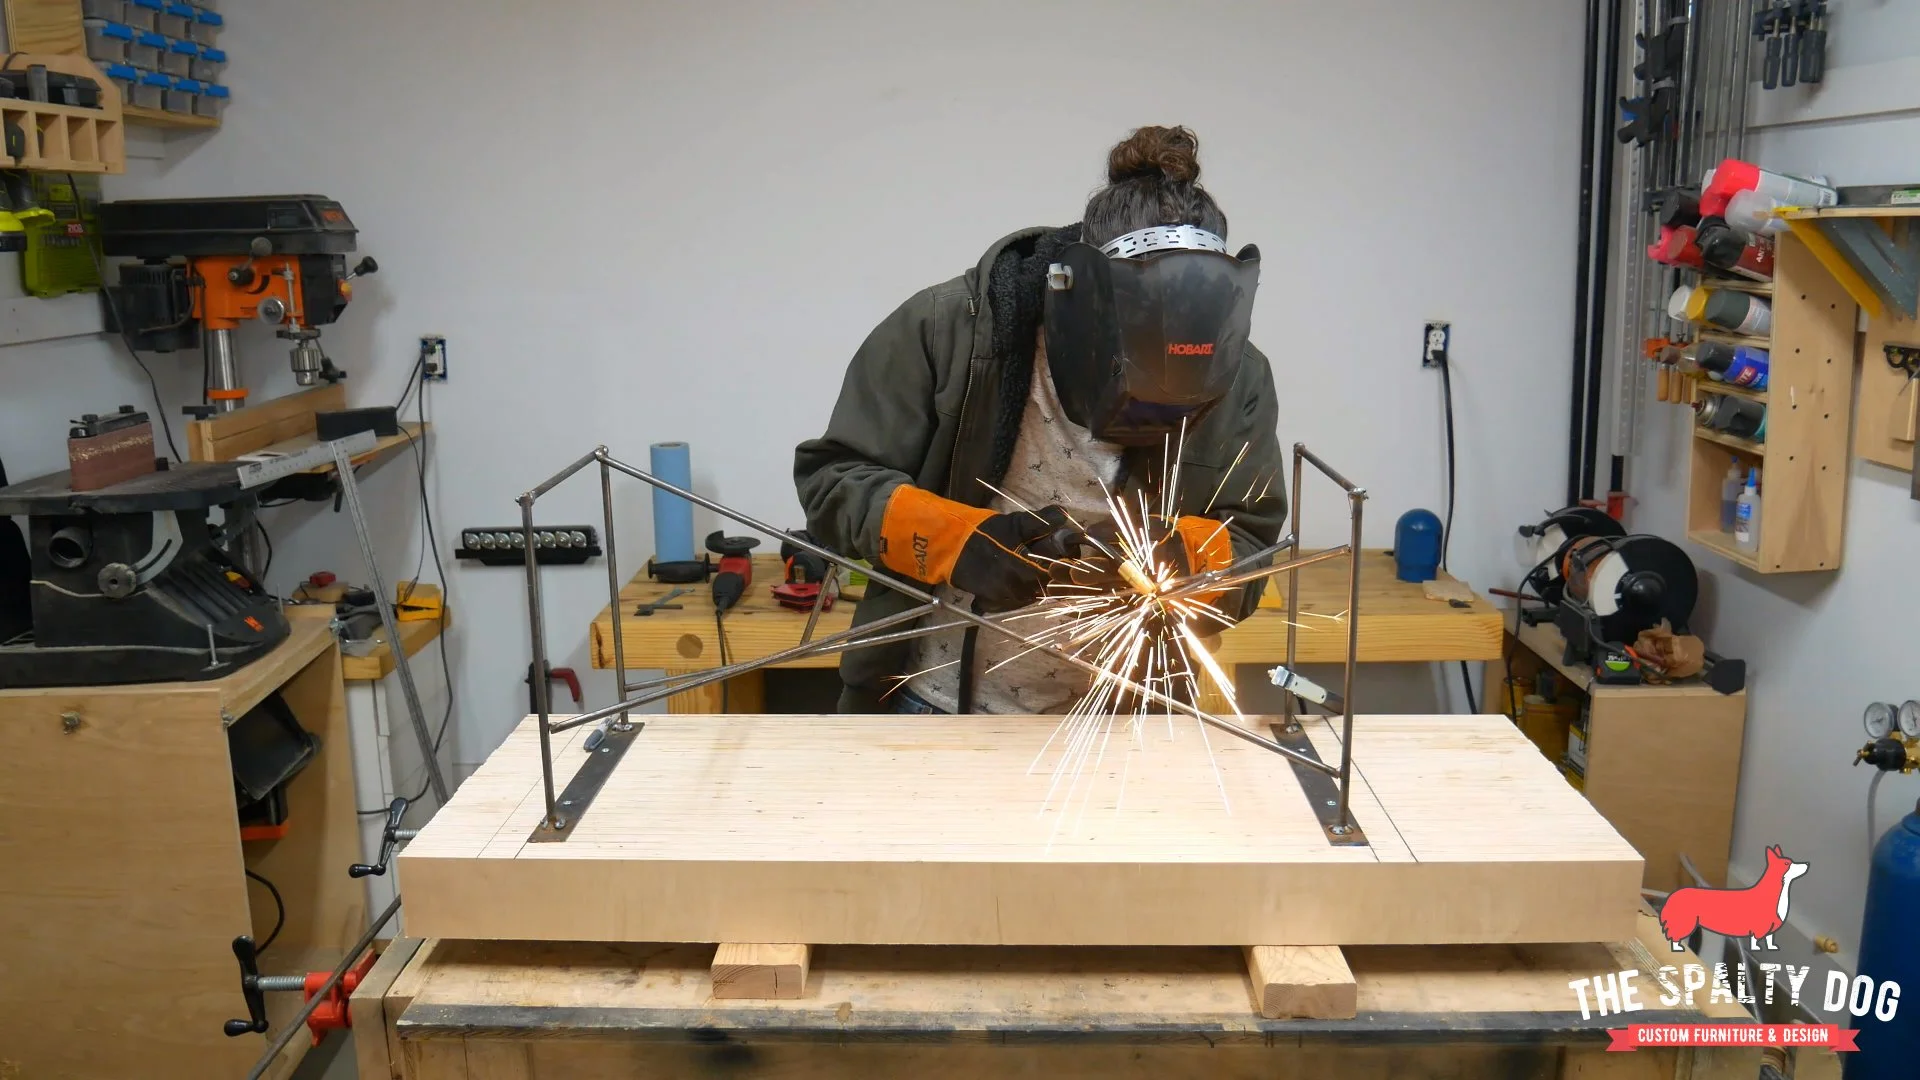
Now I can finish off the legs by adding full beads to each of my welds.

Position the legs
I set the legs aside then began marking out my lines for the top. I wanted an inch and a half clearance around the entire base, so I set my combination square and marked lines on the edges. I then used a ruler and drywall square to mark the remaining two lines since I haven’t cut the top to final length just yet.

Using the lines I just marked I know exactly where to position each leg. With each leg in place I then punch and drill pilot holes to the underside of the top. I then come back with screws to attach them temporarily.

Make the base (Part 2)
I came across a table online where the base was made from random pieces of round rod to create a geometric pattern. I really liked the style and wanted to do something similar for this piece. I’ll drop a link down in the description to that table, but essentially I’m just randomly cutting and placing pieces that look good to me.
Prep the base
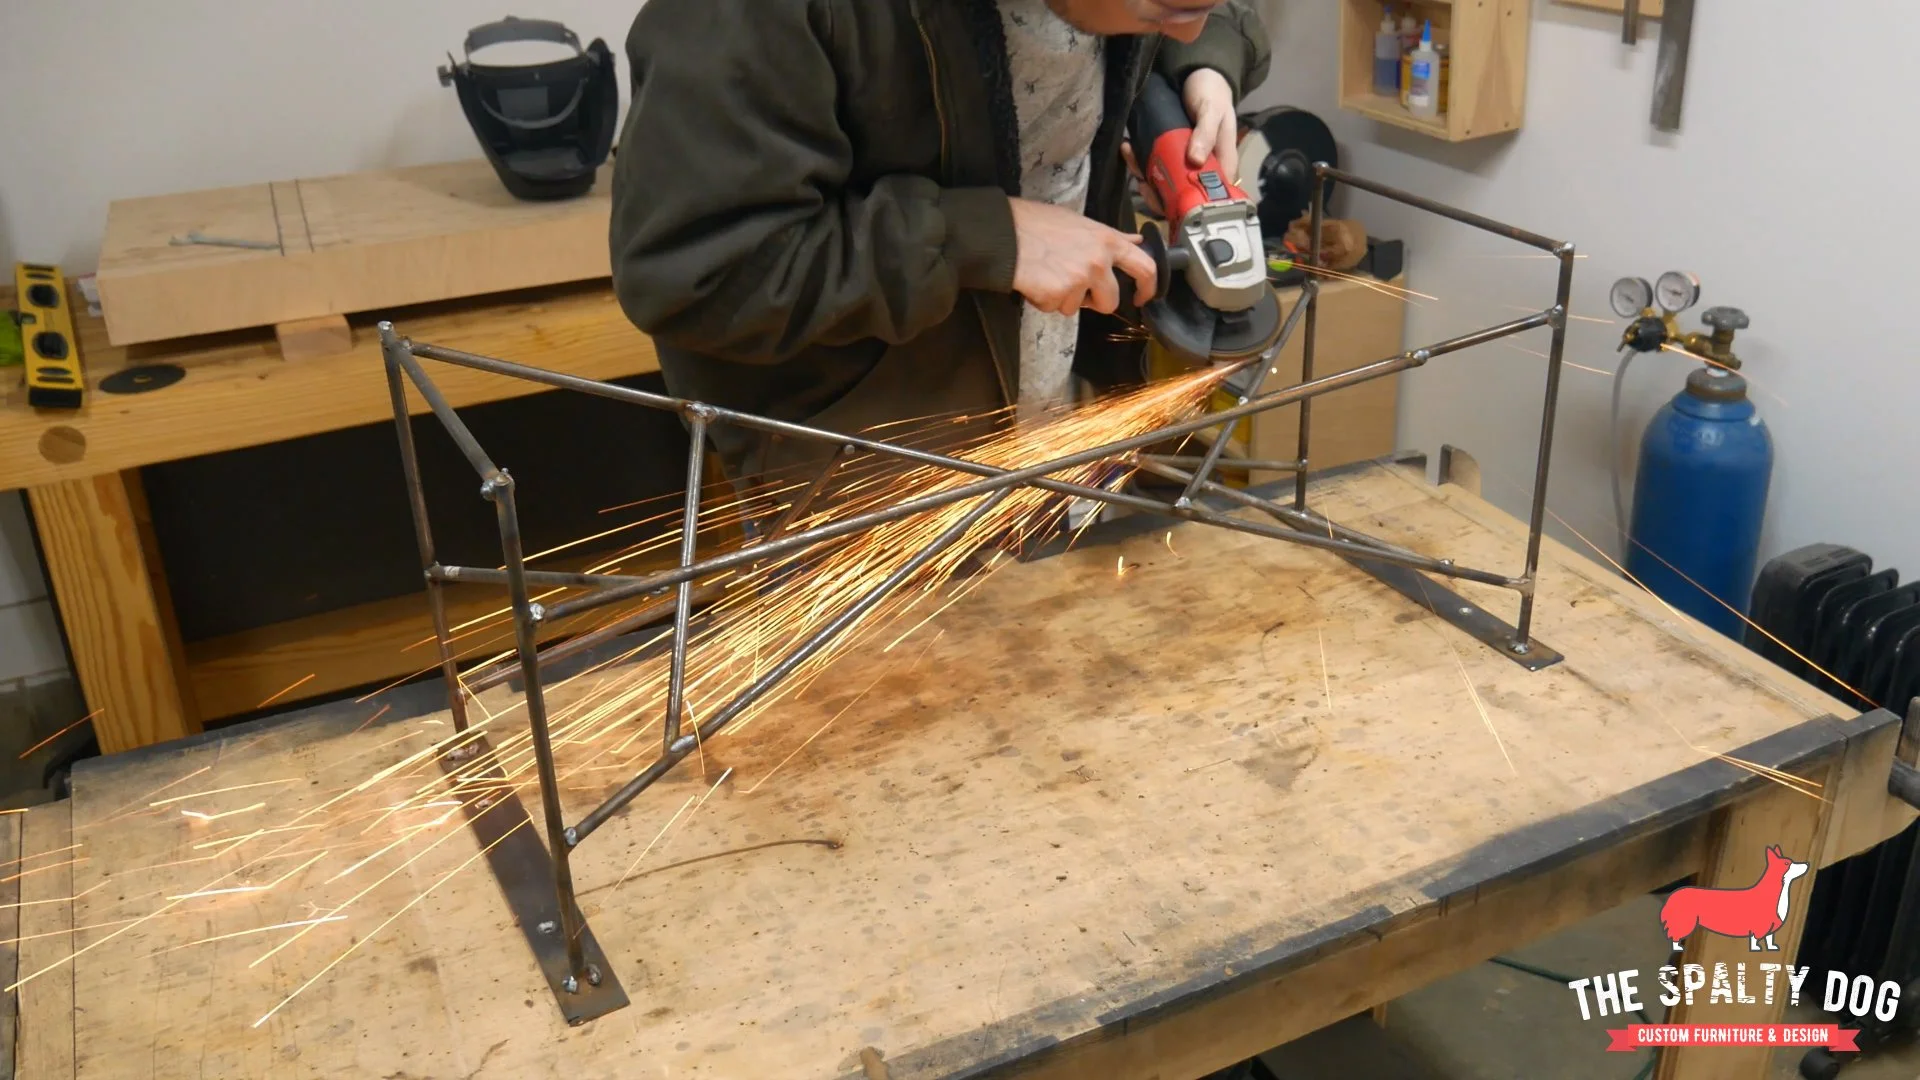
With everything welded I go back with a flap disc on my angle grinder to smooth everything down.
I then mix up an automotive body filler and spread it along each joint to fill in any voids.

After the filler has dried I remove a bulk of the excess with a file and smooth everything out with 100 grit sandpaper. At this point the base should be ready for paint.

Cut the top to final dimension
I set the base aside and went back to working on the top by cutting it to final length over on the miter saw. Now the top is slightly too large for my saw so I completed the cut using a japanese pull saw.

After cutting the ends, there were a few marks left from the blade that I cleaned up using my orbital sander.

Epoxy for days
When I was gluing up the top I noticed there were a quite a few voids that appeared in the plywood. To solve this I decided to fill them with epoxy. First I masked over all of the voids on the underside to prevent any leaking. Then flipped the top and masked around all of the remaining voids to reduce cleanup after curing. If I were to do this again I would make sure to mask closer to the spot I wanted the epoxy because it did not want to come out of the other areas as easily. This caused quite a bit of extra work later on.

With everything masked off, I mixed up the epoxy and added a dye to give it some color. I then filled the voids by simply pouring from the container and using my stir stick to move it around, then popping any bubbles with a heat gun. By doing it this way I had to pour over multiple days because the epoxy would settle overnight and not totally fill the void. If you’re doing small voids like this I would recommend using a syringe to push as much into void as possible to reduce the amount of settling.

After all the voids were filled and the epoxy had cured I removed any excess using my heat gun and a chisel. Heating the epoxy up makes it much easier to remove, leaving very little residue .

Earlier I mentioned masking closer to the area you want the epoxy to go. Here you can see there are large pink blobs on the top surrounding each of the voids. I think because the plywood has all of these micro crevices it made room for the epoxy to settle into. Which means I now need to remove the layer of wood that is holding the extra epoxy to remove the blobs. I’m not sure if this would be the case for a solid wood but just something to think about if you plan on pouring epoxy in general.

After no luck sanding the epoxy, I moved over to using my hand planes. I wanted to be careful not to tear out the veneer on the sides so I took my tiny block plane to chamfer the edges. Then I switched to my Stanley No. 7 to flatten both sides moving at a 45 degree angle while alternating in direction. This took a lot of time requiring very light passes since the grain alternates direction and the epoxy was in such small crevices. I definitely got my workout for the day.

Route and sand the top
After what seemed to be an endless time of planing, I rounded over all the edges with my plunge router. Then I sanded up from 50 to 320 to try and remove any more epoxy which seemed just as endless.

After all that planing and sanding I noticed some new voids had appeared on the top. So I repeated my previous steps to fill these new voids, but this time making sure to mask much closer to where I wanted the epoxy. I then sanded up to 320 again to achieve similar results as before but this time I went over all the epoxy with 1000 grit paper using a sanding block.

Finish the base
At this point both the top and base should be ready to finish. I wanted to do the painting first so I set the top aside then started cleaning the base with denatured alcohol.

Next I apply a self etching primer making sure to evenly coat the entire base using multiple light passes.
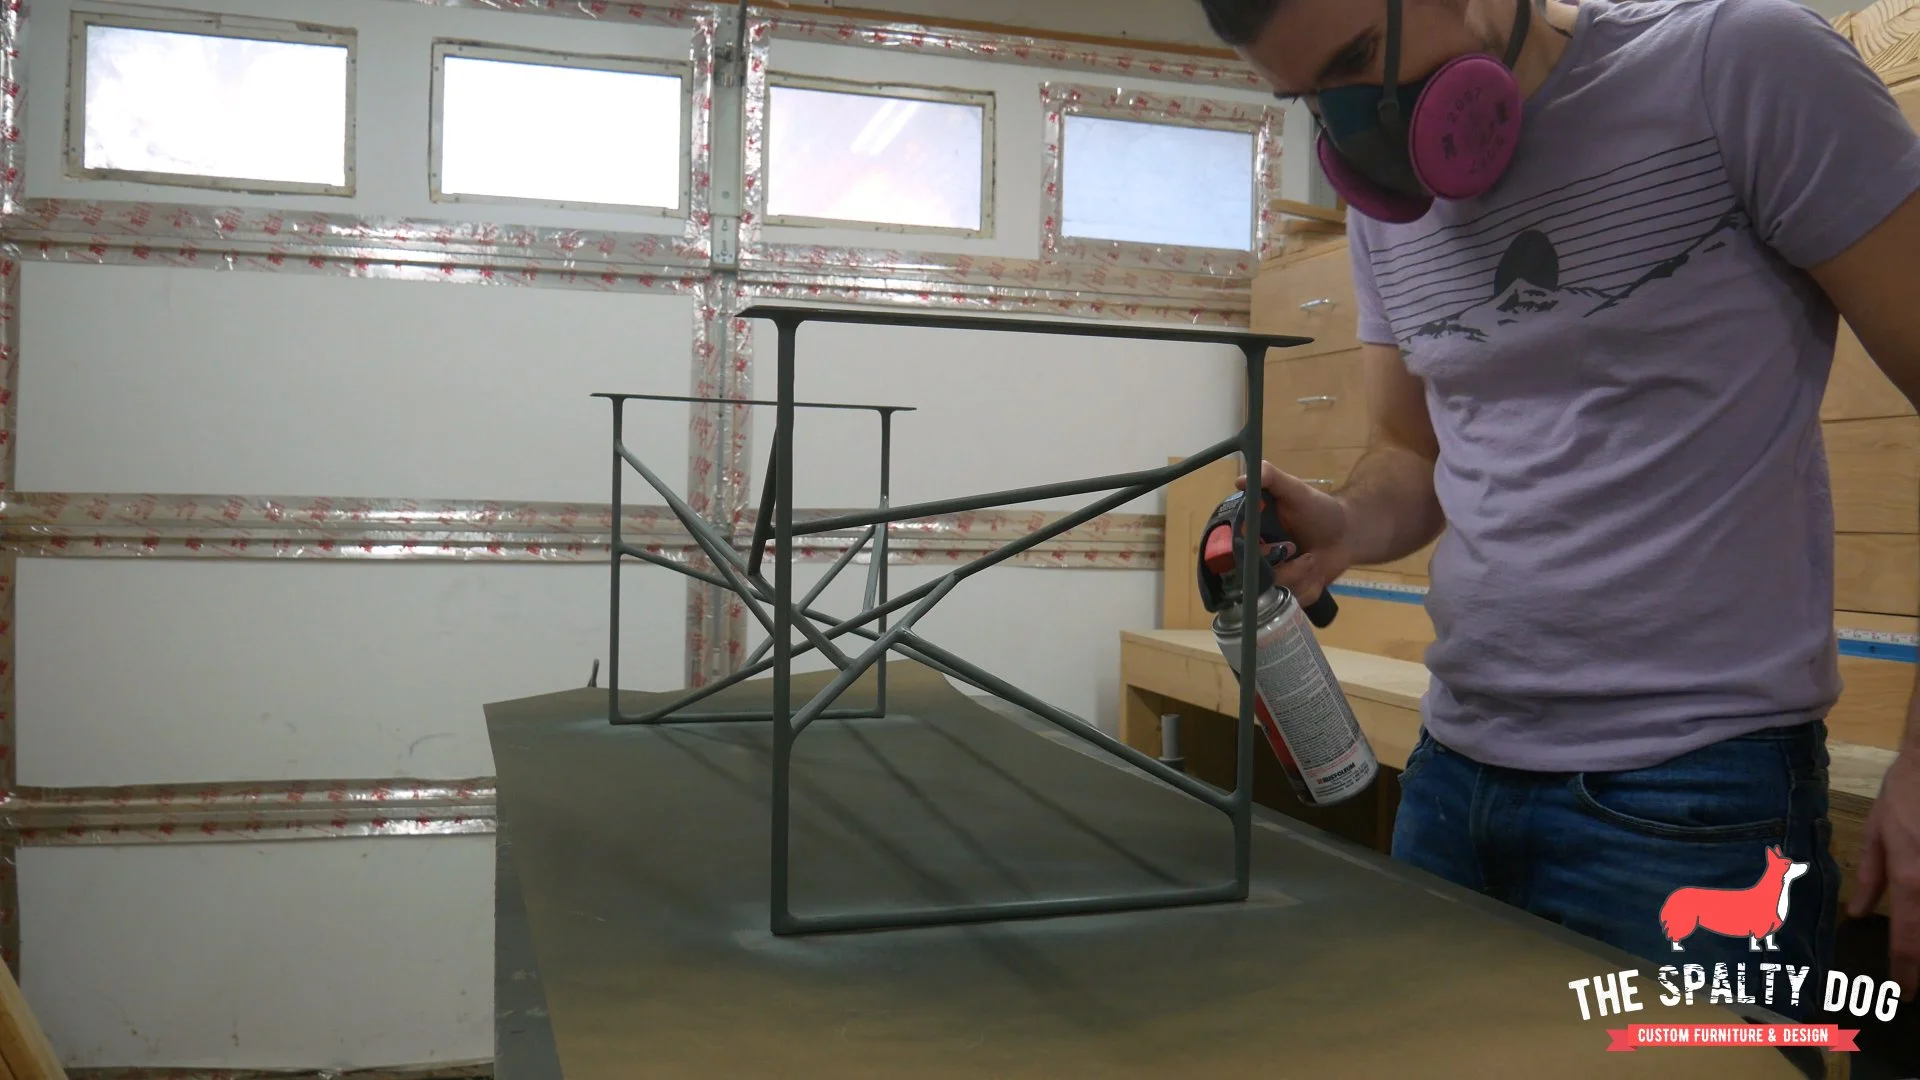
Here is where this base starts to go downhill. I wanted a really bright color for this as it was meant to be an accent piece in our basement. I started spraying on a fluorescent pink paint and it was just nothing like I expected. I decided to read the instructions and noticed it is meant to go on a white primer rather than the dark primer I had used. Off camera I tested on a piece of cardboard using a white base and it looked closer to what I wanted. So I covered the base with a white coat to try again.

After about an hour, I came back and sprayed on the same fluorescent pink that I had earlier. At first it was looking alright, but the more I sprayed to cover the white the more orange the base got. By the end it was looking like something you’d find at a glow in the dark putt putt course and that’s not what I wanted at all. So off camera I spent the rest of the night stripping it all off and getting it back down to bare metal.

I came back the next day and started all over by coating the base with a white primer. However this time, I switched to a different brand of paint and the color was great! This was the color I had wanted the entire time. I made sure to take multiple light passes and then let the paint dry for about 8 hours to fully cure.

With the paint cured, I ran over the entire base with a wet scotch brite pad to smooth the paint and remove any overspray. Doing this did reveal some of the primer but I just went back and touched up those spots with the pink right after.

The final step for the base was to apply a protective finish. For this I sprayed a high gloss varnish taking multiple light passes until I built up a thick layer on the entire base.

Finish the top
While the base is drying I apply 6 coats of a satin wipe on poly to the top and sides while wet sanding with 1000 grit between each coat. After letting the final coat dry for around 24 hours, I flipped the top over and applied 3 coats to the underside.

BEHOLD
There you have it, a modern plywood coffee table with a geometric base made with a single sheet of plywood and some 3/8 inch round rod.

Thanks for following me along on this build! If you liked what you saw, feel free to follow me on my social channels and subscribe to my newsletter to receive the latest updates of what’s going on with The Spalty Dog.